
Hello! and welcome!! In this project we're going to be creating some simple Infrastructure with Terraform while implementing the Terraform core workflow (which are write, plan & apply) in Collaboration at a Production capacity. Put simply we're going to be deploying Infrastructure with Terraform in a way that allows for a team of engineers to introduce changes to the system, have it reviewed in full details, approved or denied, and (if approved) deployed to Production.
The system we're going to build in this project will be suitable for the operations of some small to medium sized organizations (with or without the possible addition of a few more things we'll talk about at the end of the project).
For the purpose of this project, you're an Infrastruture Engineer tasked with creating initial Infrastructure for a medium sized company. We'll start by creating our infrastructure from scratch, working with Version control (Git) all the way, bootstrapping our system through a Local Backend on our workstation, migrating it to a Remote Backend to enable collaboration & creating scripts to automate the entire Continuous Integration and Continuos Deployment process.
We'll be:
- Creating barebones Infrastructure with Terraform on DigitalOcean & Cloudflare
- Configuring a Google Cloud Storage Remote Backend to enable Collaboration
- Configuring access to our GCS Backend via Github Environments & Actions workflows
- Creating Actions Workflow scripts to Initialize, Validate, Preview and Apply our Infrastructure changes.
- Making use of Github Pull Requests and the Github Bot for Proposed Infrastructure changes Reviews ( & Approval or Denials).
Here's the Project Repository on Github: https://github.com/obiMadu/terraform-github-workflow
Let's jump right in 🚀
1. Create our Infrastructure via Terraform
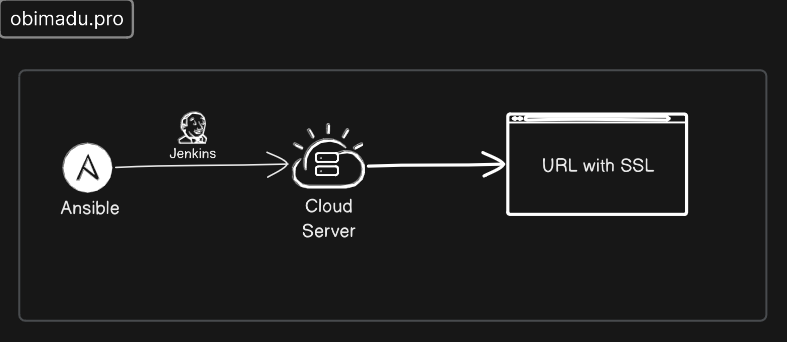
We're going to be creating the very simple Infrastructure depicted in the diagram above. A simple webserver running Nginx on Digital Ocean with an ipv4 address and a DNS A record on a Cloudflare zone that points a sub-domain to it. We will achieve this by creating just two Terraform resources.
iTip+
You could easily swap Cloudflare for any other Domain Name Service of your choice. If you have your domains managed through Amazon Route 53 for instance you don't need to switch to Cloudflare for this tutorial. Just create the appropriate Terraform configs necessary to map the IPv4 address from our server instance to a domain name (it doesn't have to be a sub-domain either, you can map an Apex domain, however you prefer it).
iTip+
As (probably) expected, it follows too that you do not need to create your server on Digital Ocean, you could deploy to AWS or any other provider of your choice, provided we get a server with Nginx installed and an Ipv4 address.
iTip+
To make things more fun you could even provision a base server and use a tool such as Ansible to deploy Nginx or any other Web App to it. You could build out your own custom image with tools like Packer and use that too. Your call. This projects aims to be fast and easy to follow.
1.1 create providers.tf
Next we're going to create a providers.tf file to configure our different providers. The provider version constraints are set to those of the lastest as of the time of this writing.
terraform {
  required_providers {
    digitalocean = {
      source = "digitalocean/digitalocean"
      version = "2.34.1"
    }
    cloudflare = {
      source = "cloudflare/cloudflare"
      version = "4.24.0"
    }
  }
}

# Digital Ocean API credentials
provider "digitalocean" {
  token = var.do_token
}

provider "cloudflare" {
  api_token = var.cloudflare_api_token
}
The above are the absolute minimum arguments required by the different providers to function properly. With this file created we're going to initialize Git in our project directory and make this file our very first commit via the following commands;
git init .
git add .
git commit -m "Initial commit"iTip+
We have made our argument values into variables to prevent hardcoding these sensitive values into our config files. Remember too, that you can customize the Git commit messages to any other of your liking.
1.2 create variables.tf
Since we've assigned variables as values to the arguments in our provider configurations, it's time to declare those variables. We do that in a file we'll call variables.tf, with the following content.
variable "do_token" {
  type = string
}

variable "do_region" {
  type = string
}

variable "cloudflare_api_token" {
  type = string
}

variable cloudflare_zone_id" {
  type = string
}
We can now go ahead and commit this new file to Git with a proper commit message.
1.3 Initialize Terraform
Now that we have our base configuration, it's time to run terraform init in our project directory to initialize Terraform.
Your success output should look similar to the above.
Now we have to do two more things;
- Add a
.gitignorefile suitable for Terraform to our project - Provide the values to the different variable's we've configured Terraform to use.
We can retrieve a .gitignore file suitable for Terraform from the following address https://github.com/github/gitignore/blob/main/Terraform.gitignoretext
iTip+
Now it's time to go ahead and retrieve the diffent API keys required for our providers from their respective platforms. We'll need;
- an API Token with
writeaccess from Digital Ocean, along with a region shortcode (which specifies in which region we wish to depoly our resources) - an API Token from Cloudflare, along with the Zone ID for the domain within which we wish to create our DNS record.
How exactly to obtain these credentials will not be covered here (you should be able to acquire them).
iTip+
For simplicity you can make use of the fra1 DigitalOcean region. This corresponds to the Frankfurt Data Center.
iTip+
Now comes the time to provide Terraform with the values we've acquired. To be straightforward we'll create a terraform.tfvars file and feed our variable values in. Our file should look something like below;
do_token = "value"
do_region = "fra1"

cloudflare_api_token = "value"
cloudflare_zone_id = "value"iWarning+
REMEMBER: You must never commit the terraform.tfvars file to Git. This file contains important application secrets that must not be shared with anyone. If a threat actore get's access to these secrets our entire infrastructure is at risk of compromise. The sole purpose of this file is for local use. We will employ a more secure method to provide these values to Terraform when we get to the CI/CD environment.
1.4 Create the Resources
Not it's time to actually create the resources for our Infrastructure. We'll create two files a servers.tf file and a dns.tf file.
- The first file,
servers.tf, we'll populate with resource configuration to create our DigitalOcean server with the Official DigitalOcean Nginx Image. As so (we'll be creating adigitalocean_dropletresource);
#create server with nginx image
resource "digitalocean_droplet" "server" {
  name     = "gate"
  size     = "s-1vcpu-1gb"
  image    = "nginx"
  region   = var.do_region
}- The second file,
dns.tfwe'll configure as so (we're creating acloudflare_recordresource);
# Add a record to the domain
resource "cloudflare_record" "server" {
  zone_id = var.cloudflare_zone_id
  name    = "server"
  value   = digitalocean_droplet.server.ipv4_address
  type    = "A"
  ttl     = 1
  proxied = true
}
Now save both files and commit them to Git with proper commit messages.
At this point your directory tree should look exactly as follows;
2. Create and Initialize the Remote Backend
It's time to add a remote backend to our project. Now because am a Google Cloud Engineer, i'll be working with a gcs remote backend in this project. You can switch this up to any other remote backend of your choice, such as an s3 backend.
iTip+
So i went ahead to create a Google Cloud Storage Bucket with the name terraform-github-workflow. I created a service account under the same name and assigned the principal the Storage Object Admin permission on the gcs bucket. This will let the service account create and manage objects in the terraform-github-workflow bucket. Next i went ahead to create a JSON service account key for the service account principal which I downloaded and stored at a good location in my local workstation.
The final step was to set the GOOGLE_APPLICATION_CREDENTIALS environment variable to the absolute path of the JSON key downloaded to my PC, like so;
export GOOGLE_APPLICATION_CREDENTIALS=/path/to/json/key/fileiWarning+
To be secure, you could always create a different service account key for use when we get to the CI/CD environment.
Finally it's time to run terraform init to initialize this new backend. Depending on your chosen backend you shoud see a success message very similar to below;
3. Create Github Actions Workflows
Now that we've got or Terraform remote backend initialized, it's time to create the Github Actions scripts for our CI/CD Pipeline. We'll create a total of 3 different workflows as follows;
- a
validateworkflow that triggers on every push to theplanbranch of our project. This will validate any new changes to our codebase using theterraform validatecommand. - a
planworkflow that triggers on every Pull request to themainbranch of the project. This workflow will dry-run the upcoming infrastructure changes and use the Github Bot to make those changes a comment on said Pull request. - a
deployworkflow that triggers on every push/merge to themainbranch. This deploys our approved infrastructure changes.
3.1 create workflows/validate.yml
We'll start by creating a .github/workflows folder in the root of our project directory. Within the workflows directory we'll create a validate.yml file. Our directory tree at this point should look like this;
Here's the content of validate workflow file;
name: Validate

on:
    push:
        branches: [plan]

env:
    GOOGLE_APPLICATION_CREDENTIALS: ${{ vars.GOOGLE_APPLICATION_CREDENTIALS }}

jobs:
  deploy:
    runs-on: ubuntu-latest

    steps:
      - uses: actions/checkout@v2
        with:
          submodules: true  # Fetch submodules (true OR recursive)
          fetch-depth: 0    # Fetch all history for .GitInfo and .Lastmod

      - name: Setup Terraform
        uses: hashicorp/setup-terraform@v3
        with:
          terraform_wrapper: true

      - name: Setup Backend Credentials
        id: backend
        run: echo '${{ secrets.GCS_KEY }}' > ${{ vars.GOOGLE_APPLICATION_CREDENTIALS }}

      - name: Terraform Init
        id: init
        run: terraform init

      - name: Terraform Validate
        id: terraform
        run: terraform validate -no-color
This workflow:
- triggers on every push to the
planbranch - runs on the
latest Ubuntuimage - checks out our code as the first step
- then sets up Terraform
- sets up
gcsbackend credentials - runs
terraform init& - runs
terraform validateon our codebase
Now let's commit this file to Git and move ahead.
3.2 create workflows/deploy.yml
Next up we'll create our deploy workflow with the following content;
name: Deploy

on:
    push:
        branches: [main]

env:
    GOOGLE_APPLICATION_CREDENTIALS: ${{ vars.GOOGLE_APPLICATION_CREDENTIALS }}

jobs:
  deploy:
    runs-on: ubuntu-latest

    steps:
      - uses: actions/checkout@v2
        with:
          submodules: true  # Fetch submodules (true OR recursive)
          fetch-depth: 0    # Fetch all history for .GitInfo and .Lastmod

      - name: Setup Terraform
        uses: hashicorp/setup-terraform@v3

      - name: Setup Backend Credentials
        id: backend
        run: echo '${{ secrets.GCS_KEY }}' > ${{ vars.GOOGLE_APPLICATION_CREDENTIALS }}

      - name: Terraform Init
        id: init
        run: terraform init

      - name: Terraform Apply
        id: apply
        env:
          TF_VAR_do_token: ${{ secrets.do_token }}
          TF_VAR_do_region: ${{ secrets.do_region }}
          TF_VAR_cloudflare_api_token: ${{ secrets.cloudflare_api_token }}
          TF_VAR_cloudflare_zone_id: ${{ secrets.cloudflare_zone_id }}
        run: terraform apply -auto-approve
This workflow:
- triggers on every push/merge to the
mainbranch - runs on the
latest Ubuntuimage - checks out our code as the first step
- then sets up Terraform
- sets up
gcsbackend credentials - runs
terraform init& - runs
terraform applywith-auto-approveto deploy our infrastructure
Once again commit this workflow to Git with a proper commit message and we'll create our final workflow.
3.3 create workflows/plan.yml
The last (but definitely not the least) workflow we'll create is the plan workflow. We're creating this workflow last because it's within it we'll integrate our Github Bot to help provide the outputs of our dry-runs so our Pull-request reviews are easier and more valuable.
So we'll make the workflow with the neccesary functionalities first and then integrate the Bot in our next step. Below's the code for our plan workflow;
name: Plan

on:
    pull_request:
        branches: [main]

env:
  GOOGLE_APPLICATION_CREDENTIALS: ${{ vars.GOOGLE_APPLICATION_CREDENTIALS }}

jobs:
  deploy:
    runs-on: ubuntu-latest
    permissions:
      pull-requests: write

    steps:
      - uses: actions/checkout@v2
        with:
          submodules: true  # Fetch submodules (true OR recursive)
          fetch-depth: 0    # Fetch all history for .GitInfo and .Lastmod

      - name: Setup Terraform
        uses: hashicorp/setup-terraform@v3
        with:
          terraform_wrapper: true

      - name: Setup Backend Credentials
        id: backend
        run: echo '${{ secrets.GCS_KEY }}' > ${{ vars.GOOGLE_APPLICATION_CREDENTIALS }}

      - name: Terraform Init
        id: init
        run: terraform init

      - name: Terraform fmt
        id: fmt
        run: terraform fmt -check
        continue-on-error: true

      - name: Terraform Validate
        id: validate
        run: terraform validate -no-color

      - name: Terraform Plan
        id: plan
        env:
            TF_VAR_do_token: ${{ secrets.do_token }}
            TF_VAR_do_region: ${{ secrets.do_region }}
            TF_VAR_cloudflare_api_token: ${{ secrets.cloudflare_api_token }}
            TF_VAR_cloudflare_zone_id: ${{ secrets.cloudflare_zone_id }}
        run: terraform plan -no-color
This workflow:
- triggers on every pull-request to the
mainbranch - runs on the
latest Ubuntuimage - acquires permission to write on Pull requests
- checks out our code as the first step
- then sets up Terraform
- sets up
gcsbackend credentials - runs
terraform init - runs
terraform fmt - runs
terraform validate(again) - runs
terraform planwith dry-run our infrastructure
Perfect! Now we can go ahead and add the Bot in the next section. Rmember to commit your new plan workflow to Git.
4. Setup the Github Bot
Adding the Github Bot to our workflow is fairly straightforward. It's just an additional step on our plan Workflow.
Add the following step to your plan.yml workflow file:
      - name: Comment plan on PR
        uses: actions/github-script@v6
        if: github.event_name == 'pull_request'
        env:
          PLAN: "terraform\n${{ steps.plan.outputs.stdout }}"
        with:
          github-token: ${{ secrets.GITHUB_TOKEN }}
          script: |
                // 1. Retrieve existing bot comments for the PR
                const { data: comments } = await github.rest.issues.listComments({
                owner: context.repo.owner,
                repo: context.repo.repo,
                issue_number: context.issue.number,
                })
                const botComment = comments.find(comment => {
                return comment.user.type === 'Bot' && comment.body.includes('Terraform Format and Style')
                })

                // 2. Prepare format of the comment
                const output = ` ## Terraform Results
                #### Terraform Format and Style 🖌\`${{ steps.fmt.outcome }}\`
                #### Terraform Initialization ⚙️\`${{ steps.init.outcome }}\`
                #### Terraform Validation 🤖\`${{ steps.validate.outcome }}\`
                <details><summary>Validation Output</summary>

                \`\`\`\n
                ${{ steps.validate.outputs.stdout }}
                \`\`\`

                </details>

                #### Terraform Plan 📖\`${{ steps.plan.outcome }}\`

                <details><summary>Show Plan</summary>

                \`\`\`\n
                ${process.env.PLAN}
                \`\`\`

                </details>

                *Pusher: @${{ github.actor }}, Action: \`${{ github.event_name }}\`, Working Directory: \`${{ env.tf_actions_working_dir }}\`, Workflow: \`${{ github.workflow }}\`*`;

                // 3. If we have a comment, update it, otherwise create a new one
                if (botComment) {
                github.rest.issues.updateComment({
                    owner: context.repo.owner,
                    repo: context.repo.repo,
                    comment_id: botComment.id,
                    body: output
                })
                } else {
                github.rest.issues.createComment({
                    issue_number: context.issue.number,
                    owner: context.repo.owner,
                    repo: context.repo.repo,
                    body: output
                })
                }
Your entire plan.yml file should now look exatly like this:
name: Plan

on:
    pull_request:
        branches: [main]

env:
  GOOGLE_APPLICATION_CREDENTIALS: ${{ vars.GOOGLE_APPLICATION_CREDENTIALS }}

jobs:
  deploy:
    runs-on: ubuntu-latest
    permissions:
      pull-requests: write

    steps:
      - uses: actions/checkout@v2
        with:
          submodules: true  # Fetch submodules (true OR recursive)
          fetch-depth: 0    # Fetch all history for .GitInfo and .Lastmod

      - name: Setup Terraform
        uses: hashicorp/setup-terraform@v3
        with:
          terraform_wrapper: true

      - name: Setup Backend Credentials
        id: backend
        run: echo '${{ secrets.GCS_KEY }}' > ${{ vars.GOOGLE_APPLICATION_CREDENTIALS }}

      - name: Terraform Init
        id: init
        run: terraform init

      - name: Terraform fmt
        id: fmt
        run: terraform fmt -check
        continue-on-error: true

      - name: Terraform Validate
        id: validate
        run: terraform validate -no-color

      - name: Terraform Plan
        id: plan
        env:
            TF_VAR_do_token: ${{ secrets.do_token }}
            TF_VAR_do_region: ${{ secrets.do_region }}
            TF_VAR_cloudflare_api_token: ${{ secrets.cloudflare_api_token }}
            TF_VAR_cloudflare_zone_id: ${{ secrets.cloudflare_zone_id }}
        run: terraform plan -no-color

      - name: Comment plan on PR
        uses: actions/github-script@v6
        if: github.event_name == 'pull_request'
        env:
          PLAN: "terraform\n${{ steps.plan.outputs.stdout }}"
        with:
          github-token: ${{ secrets.GITHUB_TOKEN }}
          script: |
                // 1. Retrieve existing bot comments for the PR
                const { data: comments } = await github.rest.issues.listComments({
                owner: context.repo.owner,
                repo: context.repo.repo,
                issue_number: context.issue.number,
                })
                const botComment = comments.find(comment => {
                return comment.user.type === 'Bot' && comment.body.includes('Terraform Format and Style')
                })

                // 2. Prepare format of the comment
                const output = ` ## Terraform Results
                #### Terraform Format and Style 🖌\`${{ steps.fmt.outcome }}\`
                #### Terraform Initialization ⚙️\`${{ steps.init.outcome }}\`
                #### Terraform Validation 🤖\`${{ steps.validate.outcome }}\`
                <details><summary>Validation Output</summary>

                \`\`\`\n
                ${{ steps.validate.outputs.stdout }}
                \`\`\`

                </details>

                #### Terraform Plan 📖\`${{ steps.plan.outcome }}\`

                <details><summary>Show Plan</summary>

                \`\`\`\n
                ${process.env.PLAN}
                \`\`\`

                </details>

                *Pusher: @${{ github.actor }}, Action: \`${{ github.event_name }}\`, Working Directory: \`${{ env.tf_actions_working_dir }}\`, Workflow: \`${{ github.workflow }}\`*`;

                // 3. If we have a comment, update it, otherwise create a new one
                if (botComment) {
                github.rest.issues.updateComment({
                    owner: context.repo.owner,
                    repo: context.repo.repo,
                    comment_id: botComment.id,
                    body: output
                })
                } else {
                github.rest.issues.createComment({
                    issue_number: context.issue.number,
                    owner: context.repo.owner,
                    repo: context.repo.repo,
                    body: output
                })
                }
5. Push Codebase to Github
After you're done commiting the above new additions to Git, it's time we publish our infrastructure codebase to Github.
Now simply head over to Github and create a public (or private) repository, add the repository as the origin remote for the project in our local machine, and push.
Immediately you do this, your deploy workflow should start to execute, but no worries because it's going to fail. It'll fail because the Github Actions environment has not been configured with the proper credentials to both Initialize our Terraform Backend and to provide the appropriate values to the variables defined in our infrastructure.
Now it's time to properly configure the Github Actions CI/CD Environment with the appropriate access credentials to deploy our workload.
6. Configure Github Environments for Terraform Backend & Variables
Now, we need to head over to Github Environments and configure the secrets and env vars neccessary for our workflow to succeed.
If you'd noticed throughtout our Github Actions workflows, for every operation that affects the Terraform state, we've included the different environment variables needed by Terraform to execute. An instance of this is found at the terraform apply command in the deploy workflow. The code snippet is as follows;
      - name: Terraform Apply
        id: apply
        env:
          TF_VAR_do_token: ${{ secrets.do_token }}
          TF_VAR_do_region: ${{ secrets.do_region }}
          TF_VAR_cloudflare_api_token: ${{ secrets.cloudflare_api_token }}
          TF_VAR_cloudflare_zone_id: ${{ secrets.cloudflare_zone_id }}
        run: terraform apply -auto-approve
So below's a list of all different secrets and env vars we need to set (you'll see that all of them have been incorporated into the different workflows at the appropriate places);
- Terraform Variables
TF_VAR_do_tokenTF_VAR_do_regionTF_VAR_cloudflare_api_tokenTF_VAR_cloudflare_zone_id
- Remote Backend secrets & vars
GCS_KEY- The Google Cloud Storage key.GOOGLE_APPLICATION_CREDENTIALS- Path to the Google Cloud Storage key in the filesystem
iWarning+
Remember to create a different GCS Key for the Github Actions Environment, and disable the one we've used to Initialize Terraform locally, from now on any new changes to the Infrastructure will be processed through our workflow. You should not use your Key even for the Initial deploy of resources.
Alright now head over to your Github Dashboard -> Settings -> Secrets and Variables -> Actions page. This is the page depicted below.
Next we'll go ahead and fill out the values for the different secrets and environment variables.
iTip+
As a result of the fact that we're only working with a single environment in this project, we'll fill these out as Repository secrets and variables. In a more advanced setup where we'd have dev, stage, qa, prod environments, we'd make use of the core Github Environments solution. This project doesnt get that advanced, and so we'll stick with the Repo secrets and variables.
iTip+
-
Aside from the
GOOGLE_APPLICATION_CREDENTIALSvariable, every other thing should be a secret. Use a value of./key.jsonfor this variable, to keep it simple. -
To switch between
secretsandvariablesmake use of the Tabs under the same names on the page.
When all is set we should have pages that look as below:
Now we have all our secrets and variables configured. 🎉 🎉
7. Test out the entire workflow
Finally, it's time to put this giant wheel in motion.
7.1 create the plan branch
The first step's going to be to create the plan branch of the project. We've referred to it alot throughout the previous steps, it's time to actually create it.
So we'll achieve that with the following command:
git checkout -b planThis will create the new plan branch and move check-it-out to our current working directory. Next we'll push this branch to Github and set it to track a new origin branch under the same plan name.
git push -u origin planThis push should trigger a validate workflow over in Github, if this succeds, then we're on the right path. If it doesnt then you need to shop around to find out what you might have missed, to fix it. Take a look the Actions workflow error logs to understand any errors.
If you've followed this walkthrough religiously though, you should have success screens similar to the ones below. Your very first validate workflow should be a success.
7.2 prepare for & create the very first PR to main
Now to kickstart our workflow we need to create our first Pull request to the main branch. At this point that'll be impossible because our main and plan branches are in sync. To make it work, we need to make a dummy commit to the plan branch.
To keep it simple we'll just add a comment to one of our Infrastructure files, commit the change, and PR to main.
iTip+
You can add a comment to any file of your choice. I'll do so to the backend.tf file. I'll the following lines to the start of the file
# Configure the remote gcs backendNow save your modified file, commit it and push it to Github. That should start a new validate workflow run over at Github;
And it should succeed.
Now we can go ahead and create our first Pull request to main. If everything works fine, you should get outputs similar to the ones I got below.
Everywhere should be green in your Pull Request now 🎉 🎉
7.3 examine plan outputs via Bot comment
Now that your workflows have run successfully you should be able to see the new Bot comment that contains very important details about your proposed infrastructure changes.
Go ahead and expand the diffent sections of the comment to get more details. Clicking the Show Plan button for instance will show you the output of the terraform plan command.
As you can see, because we have only two resources defined in our configuation, we see a plan to create two resources.
7.4 review, iterate-on, & approve (or deny) the plan
At this point, using Github native Branch rules, a minimum number of reviewers can be required to review the new Infrastructure changes and sign-off on it. The team can change whatever they need to, new commits to the plan branch will stack up under this pull request, triggering a re-run of the plan workflow each time, making sure the team sees the most up-to-date changes to be made on the next apply.
Now because we want to see this workflow to the end and ensure our Infrastructure actually gets created, we're going to assume the Team absolutely digs our new Infra and those responsible have signed off on it. We're going to go ahead as a result and Merge this Pull Request #1 and have our Infra deployed.
7.5 and... it's Christmas
iTip+
Am rebasing just because i like a tidy commit history.
This should trigger our deploy workflow in the main branch, and as expected, it shoud work flawlessly, like so;
WE DID IT!!! 🎉 🎉
To confirm our infrastructure is live in the real world we can visit it's web address. Mine was server.obi.ninja and it worked flawlessly.
iTip+
I have https:// because I setup the free SSL service from Cloudflare. This I did outside Terraform, as was setting up the Clouflare zone itself, to keep this project and walkthrough simple.
8. Additional Notes
8.1 Github Branch Protection Rules
To make this project bullet proof so that it works reliably for your organization, you need to utilize Github Branch Protection Rules. With these rules you will be to enforce important things such as;
- making sure the
mainandplanbranches cannot be deleted - allowing a merge to
mainonly after both thevalidateandplanworkflows are successful - specifying the minimum number of people who are allowed to sign off on any new change
- etc.
8.2 Additional Tools
You may wish to expand the different parts of this project with additional tools to enhance security. Tools such as:
- Hashicorp Vault for secrets management
- Sonarcube for additional static and code quality analysis
- etc.
8.3 Destroying Infrastructure
This is a team workflow, and it's the backbone of the company's infrastructure, as a result any destroying of resources must be carried out by deleting or commenting the Terraform code for said resources and having such change go through review by the responsible Team. No one will be able to just run terraform destroy and destroy resources, as long as the Infrastructure secrets are managed properly.
8.4 Conclusion
I've had a lot of fun coming up, executing and documenting this project. I hope you find it useful. Don't hesitate to let me know what you think, any errors, or room for improvement in the comment section below.
Read more

Self Hosting Project (DevOps Infra from Scratch)
A comprehensive guide to building a self-hosted DevOps infrastructure from scratch using Terraform, Ansible, and Docker.

Deploy a server on Digital Ocean via Terraform (HowTo)
A step-by-step guide to provisioning a DigitalOcean droplet using Terraform and basic Infrastructure as Code practices.
Auto-Deploy Jenkins to a remote server (with free SSL) via Ansible (HowTo)
Learn how to automatically deploy a self-hosted Jenkins server with free auto-renewing SSL certificates using Ansible.